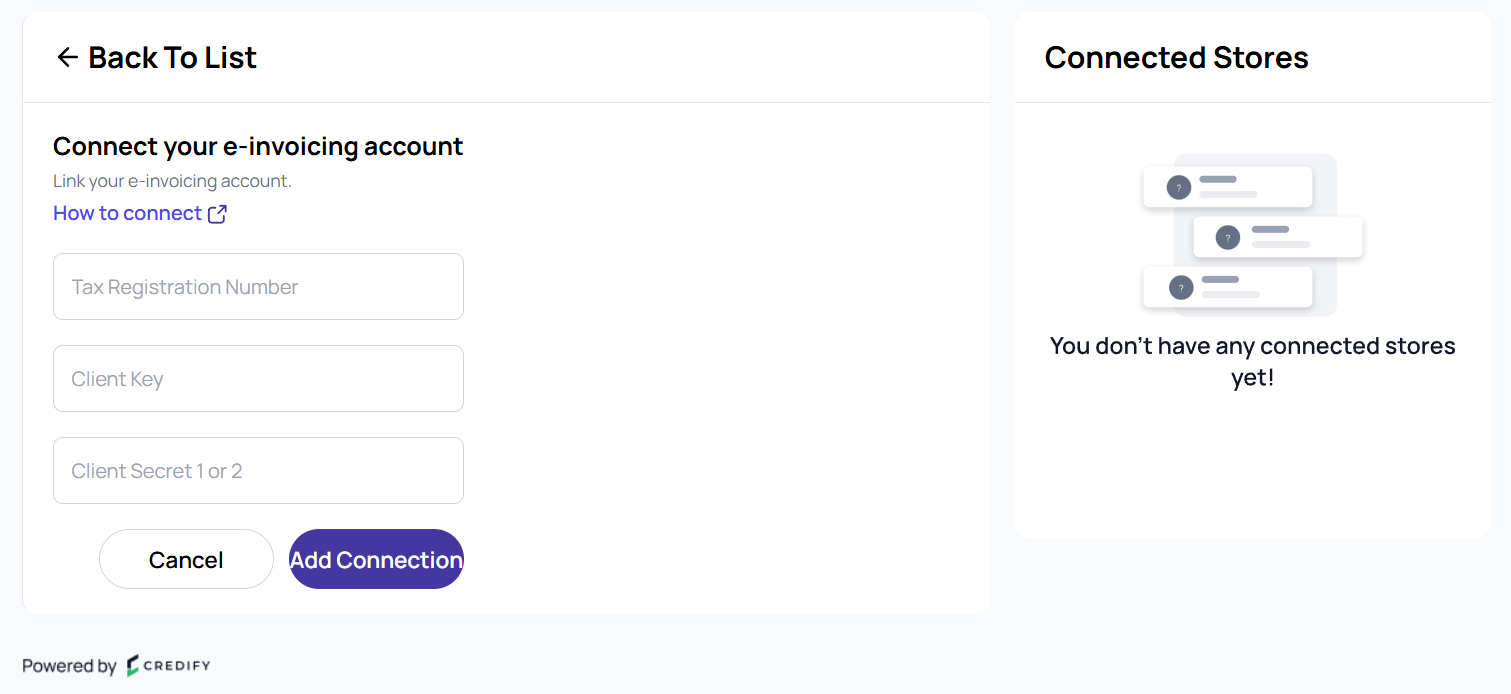
How to Integrate Credify with E-invoicing
Steps to Integrate E-Invoicing with Credify
- Login to your E-Invoicing account.
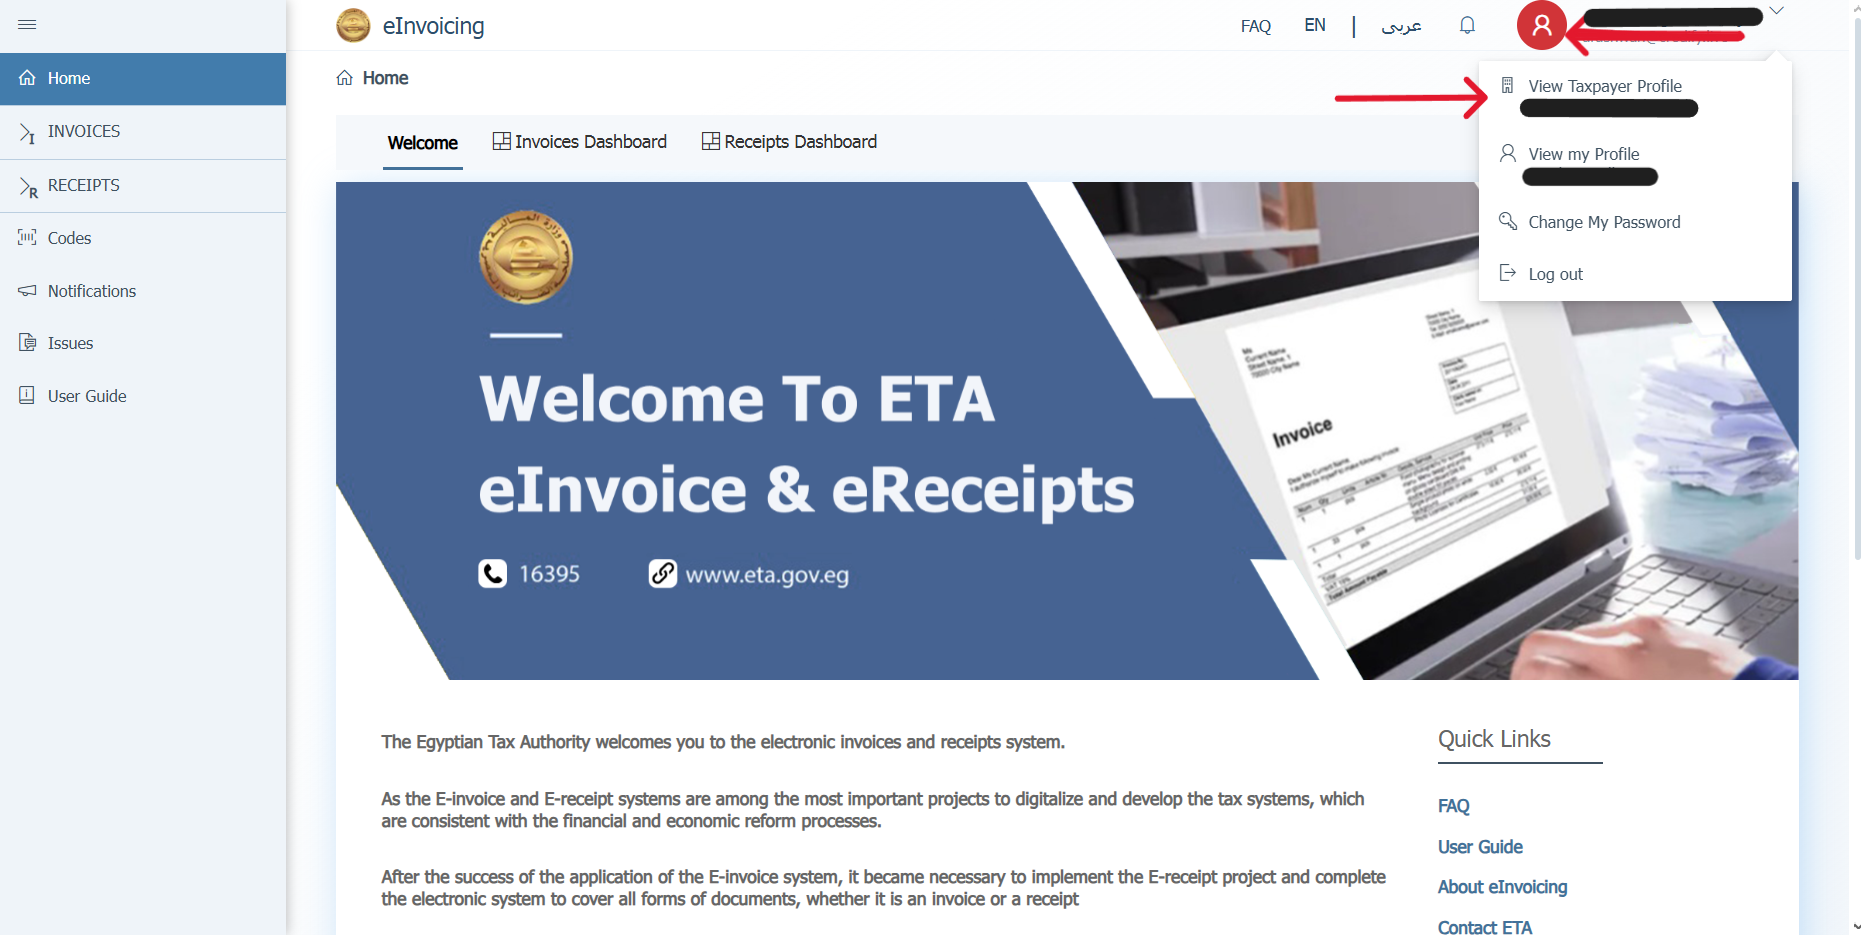
- Click on the Profile icon in the top right and select "View Taxpayer Profile".
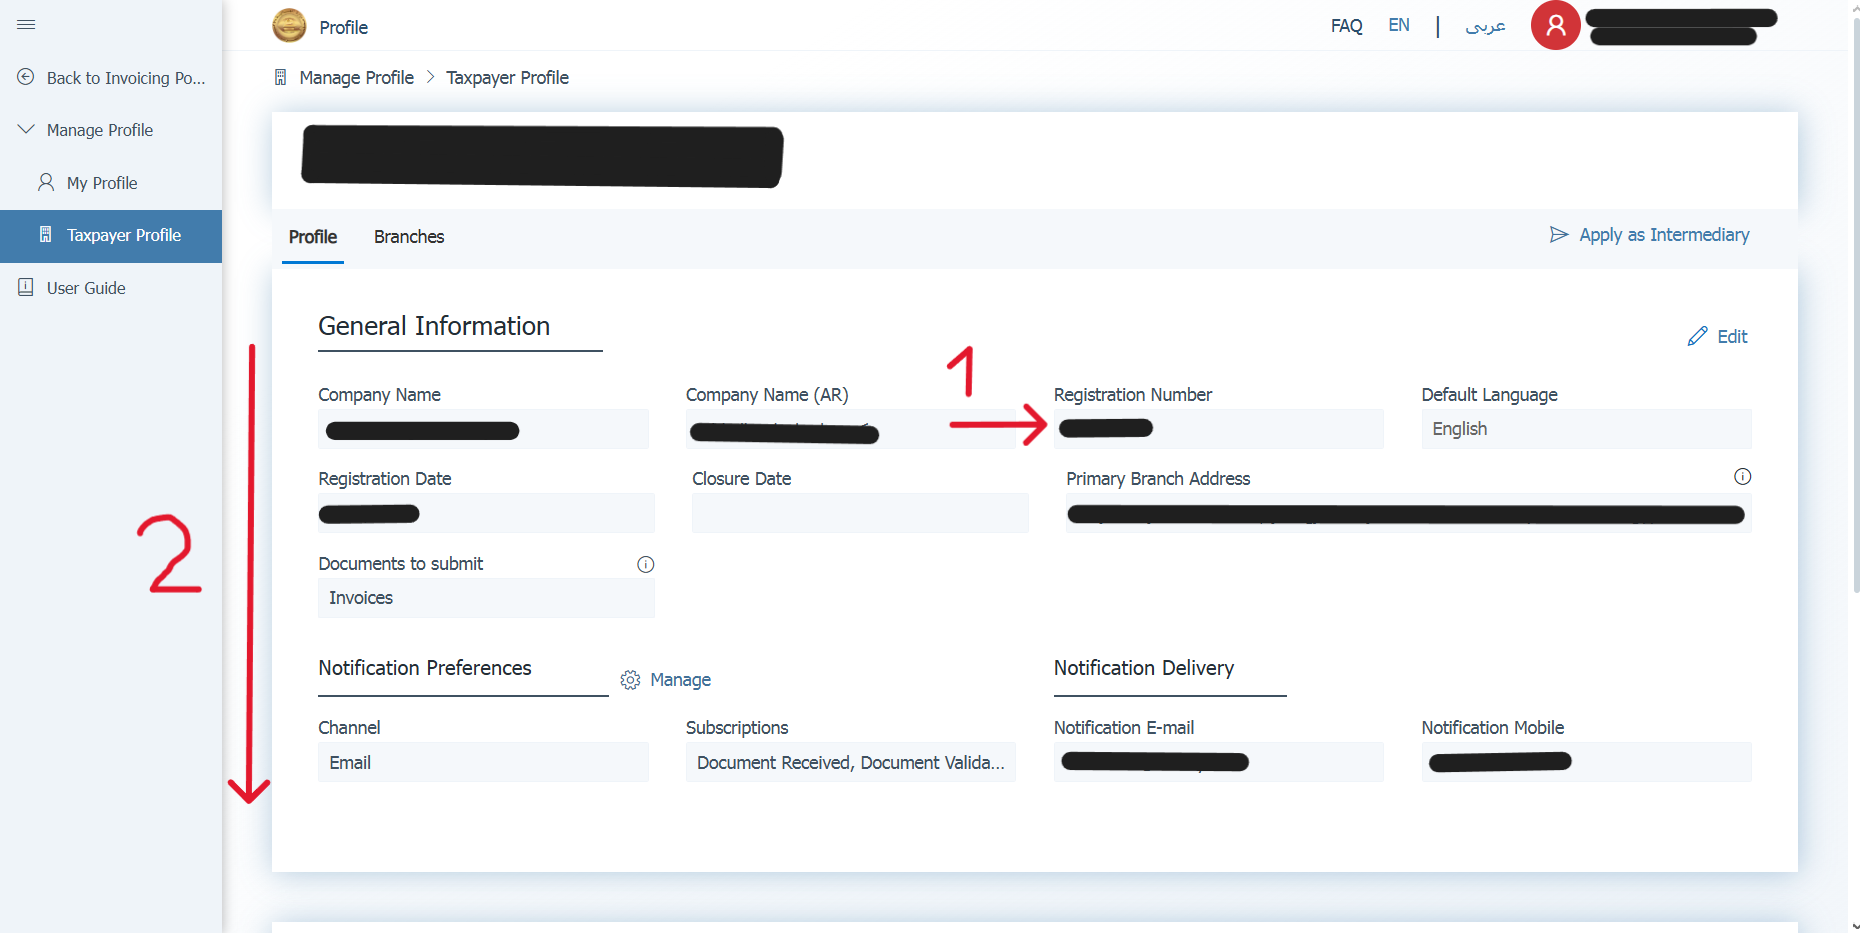
- Copy the Registration number to an external file, then scroll down to the bottom of the page, and go to "Representatives".
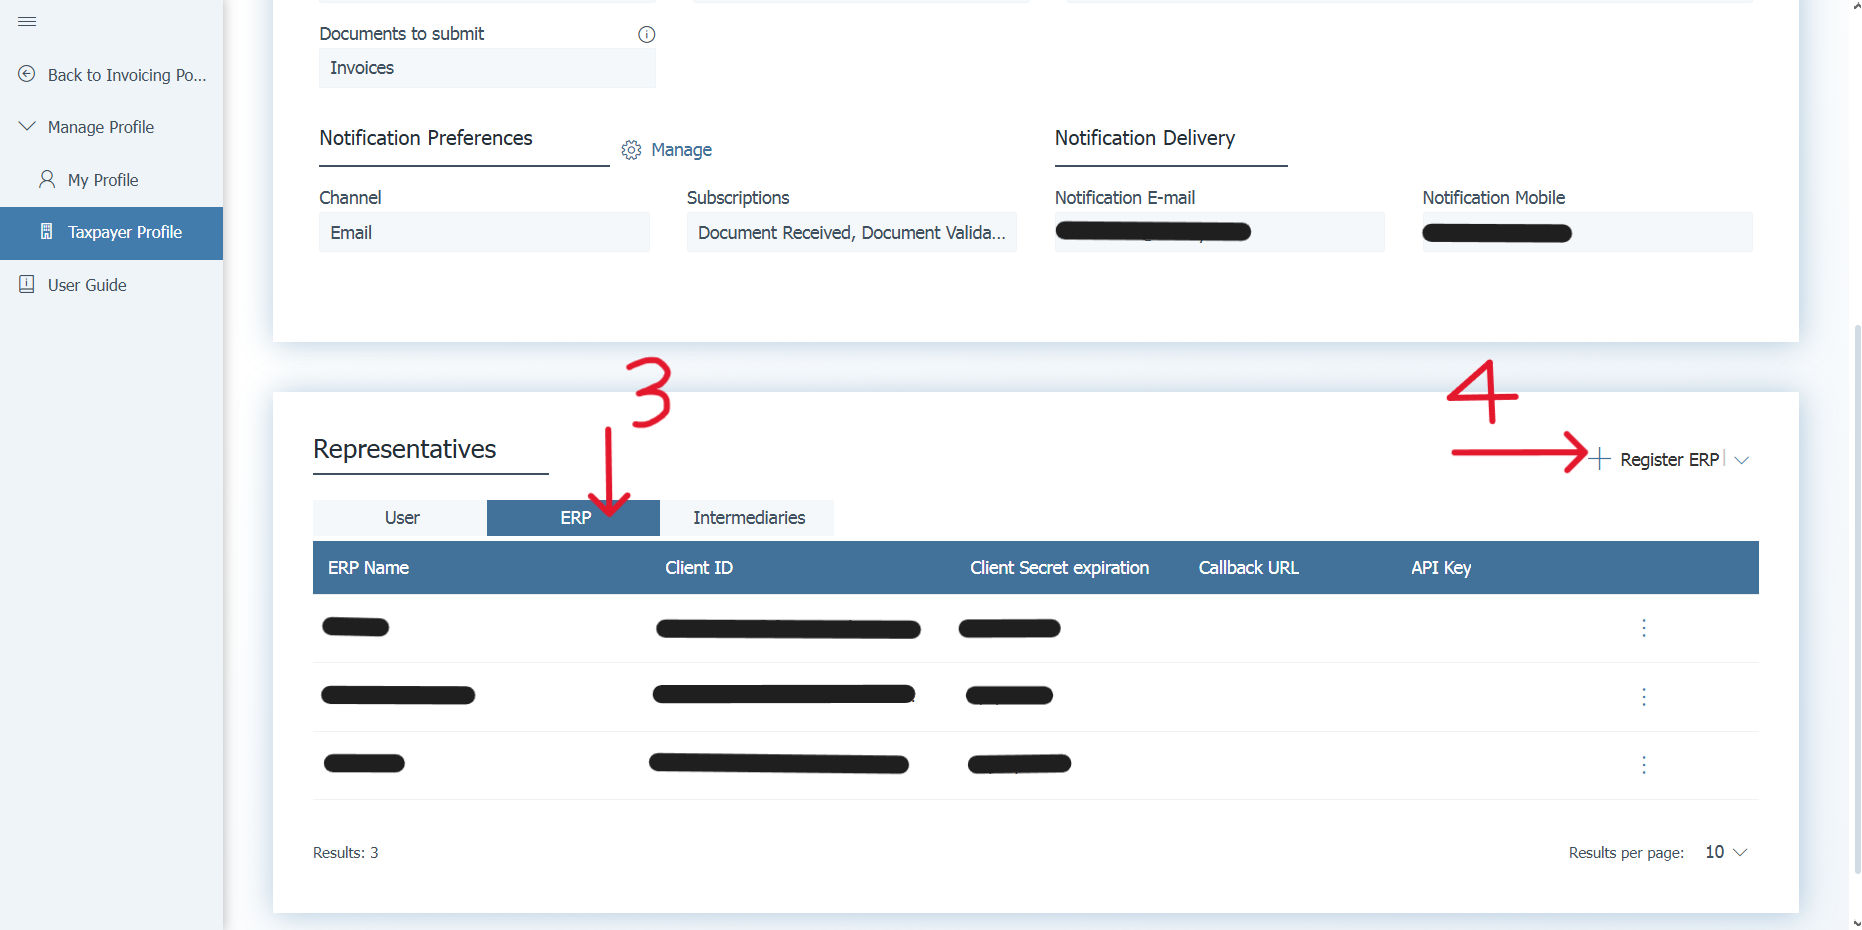
- Click on the "ERP" tab, then click on the "+ Register ERP" button.
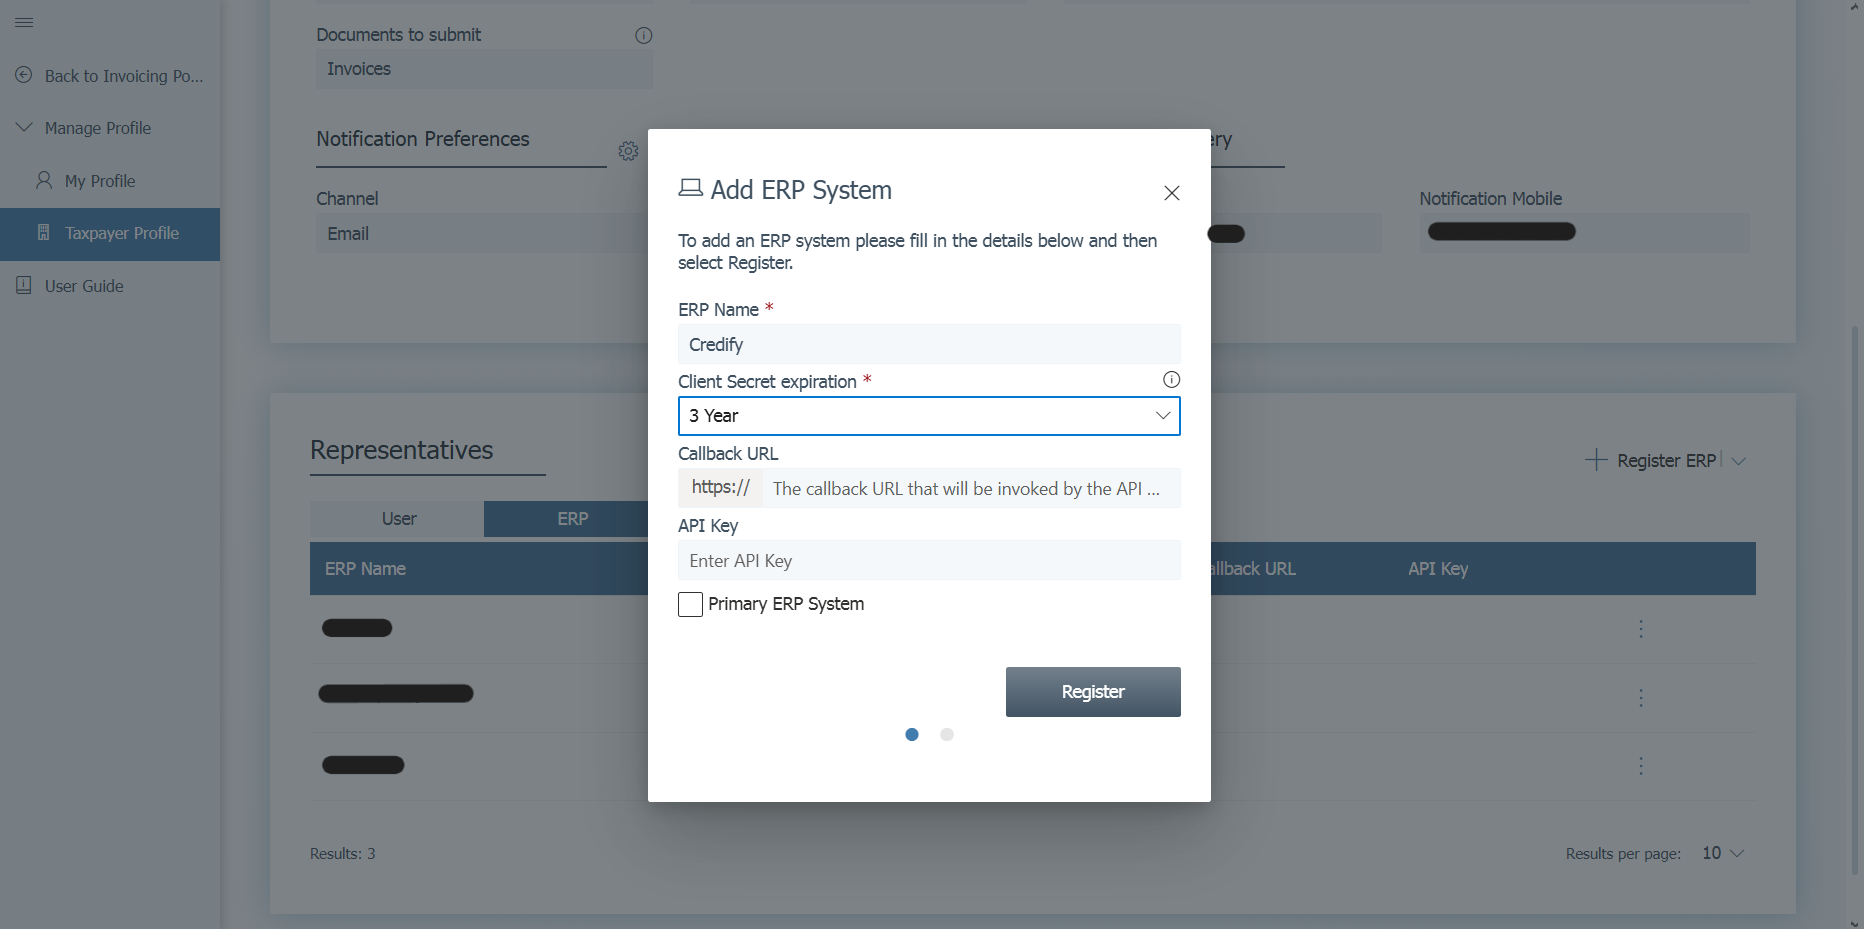
- Add "Credify" as the ERP Name, select "3 years" as the client secret expiration, and click "Register".
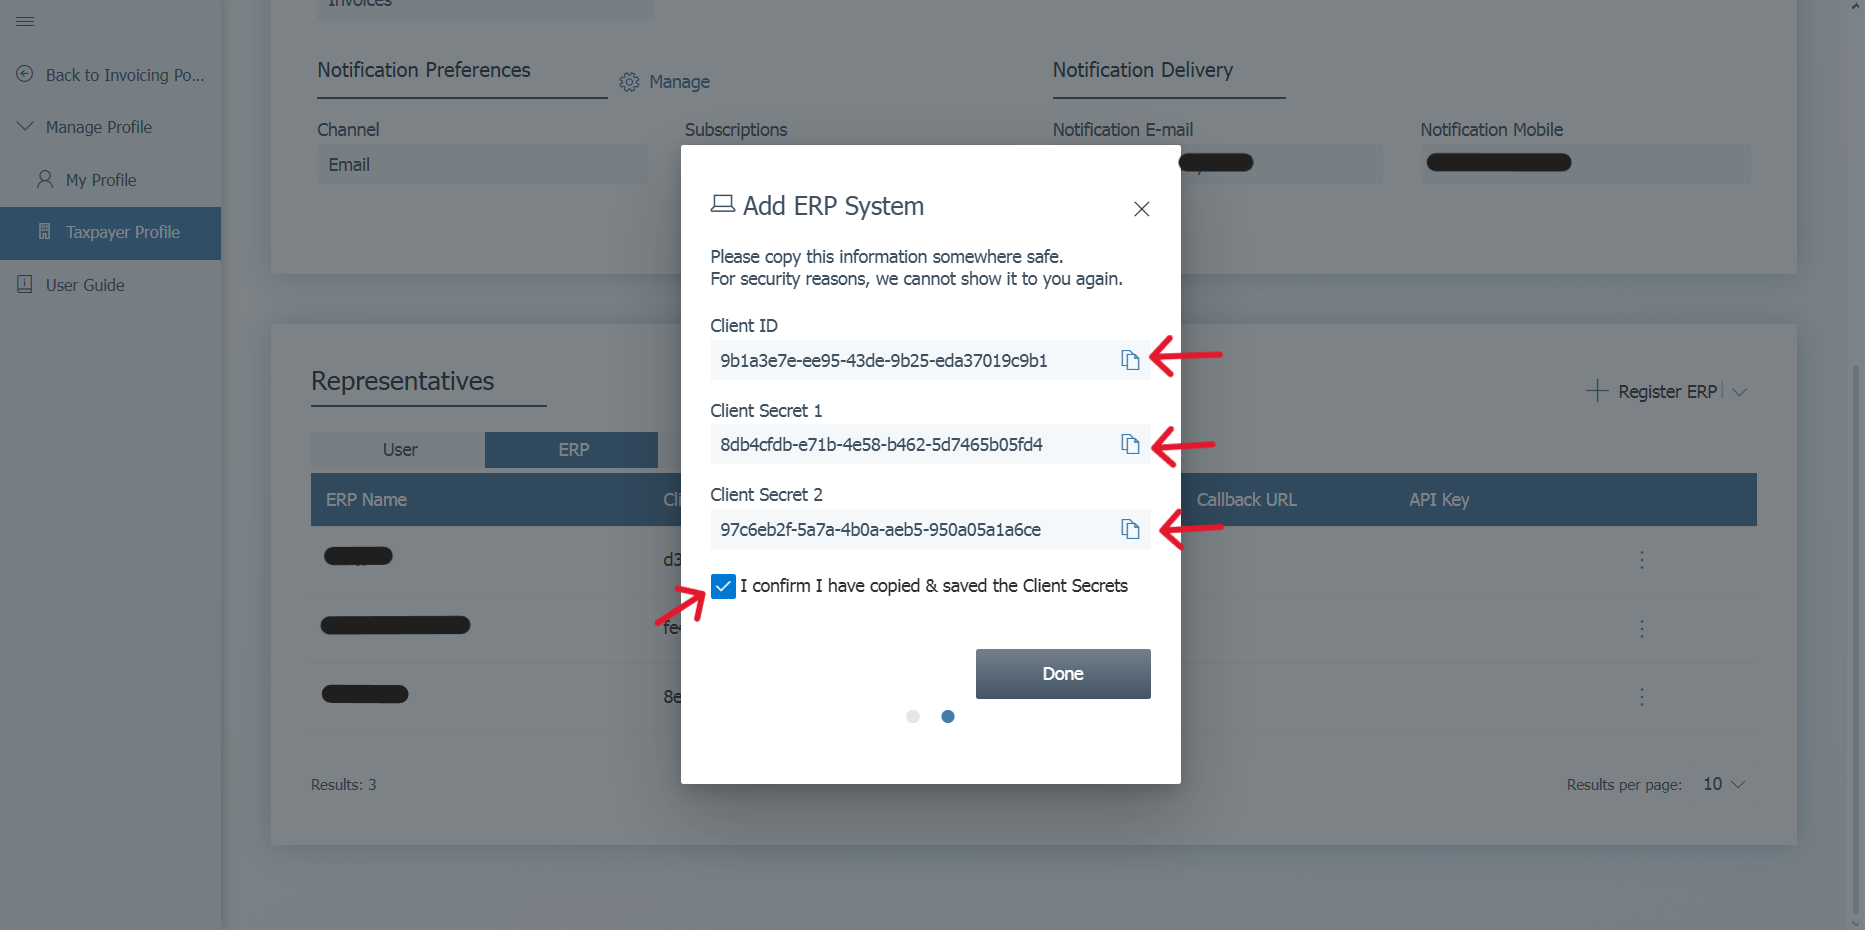
- Copy and Paste the Client ID, Client Secret 1, and Client Secret 2 to an external file, mark the Checkbox, and then select Done.
- In the Credify Connection Page, add your data saved in previous steps and click "Add Connection".
